In this post, I will walk through an end-to-end setup of a Python AWS Lambda: managing dependencies with the uv package manager, packaging it into a flat zip, and deploying it purely with Terraform - no Serverless Framework involved.
Why Terraform instead of the Serverless Framework
Before we dive in, let me explain why I chose Terraform to deploy Lambdas rather than the Serverless Framework.
There are multiple reasons for that:
Serverless is a JavaScript framework, so using it to deploy Python Lambdas means bringing in a whole new ecosystem and installing Node dependencies. Plus, if you are into IaC as much as I am, you still need Terraform for plenty of other things anyway.
Serverless manages Lambdas with CloudFormation, which can be harder to troubleshoot and slower to correct. It also throws the occasional weird failure. For example, it may refuse to deploy when the actual state differs from what CloudFormation knows about - say, after a manual change - or fail to roll back to a previous version.
Last but not least - Serverless is free to use until the company using it crosses a certain revenue threshold.
With Terraform, all infrastructure is managed in a single tool, which makes it easier to understand and support. You need to do more things manually, but you get more confidence in the result, and you can do precisely what you need.
Prerequisites
Before we start, make sure you have a few things ready:
An AWS account.
AWS credentials configured locally, so Terraform can authenticate on your behalf.
Terraform CLI, version 1.10 or newer.
uv installed. It will manage Python 3.13 for you, so you do not need a separate Python installation.
The zip utility, which comes out of the box on macOS and Linux.
That is it - let's dive in.
Python Lambda setup
Folder structure
Here is what the project looks like once everything is in place:
demo-aws-lambda-terraform-uv/
├── app/
│   ├── environment.py
│   ├── main.py
│   └── models/
│       ├── __init__.py
│       └── event.py
├── terraform/
│   ├── demo-lambda.tf
│   ├── providers.tf
│   └── terraform.tf
├── pyproject.toml
└── uv.lock
So, our dependencies go into pyproject.toml in the repository root. All infrastructure goes into the terraform/ folder, and all application code goes into the app/ folder.
Dependencies with uv and pyproject.toml
First, let's set up our dependencies for uv. I want to showcase a bit more than just a single-file Lambda, so I will add two libraries: pydantic, to build a model I will parse the Lambda event into, and pydantic-settings, to work with environment variables. This is what my pyproject.toml file looks like:
[project]
name = "demo-aws-lambda-terraform-uv"
version = "0.1.0"
requires-python = ">=3.13"
dependencies = [
    "pydantic",
    "pydantic-settings",
]

[dependency-groups]
dev = [
]
Then, I run two commands to set up my environment:
uv lock
uv sync
This will create a uv.lock file and a .venv folder containing a virtual environment with the dependencies installed.
Lambda handler
Now, let's set up a simple Lambda handler function. The app/main.py will look like this:
import logging

logger = logging.getLogger(__name__)
logger.setLevel(logging.INFO)

def handler(event, context):
    logger.info("Hello, World!")
Event model
Let's customize this just a little bit, and let the user specify their name in the Lambda event.
To do this safely, we will create a pydantic model. First, an empty app/models/__init__.py to mark it as a module, and then app/models/event.py looks like this:
from pydantic import BaseModel

class LambdaEvent(BaseModel):
    name: str = "World"
Setting the default value to "World" makes the field optional, so the caller does not have to pass it in. When the event does not include the field, the Lambda will not fail - it uses the default value instead.
Remove the default value, and the Lambda will fail whenever the incoming event does not include the name field.
And then, let's wire it up in the main.py:
import logging

from app.models.event import LambdaEvent

logger = logging.getLogger(__name__)
logger.setLevel(logging.INFO)

def handler(event, context):
    lambda_event = LambdaEvent.model_validate(event)
    logger.info(f"Hello, {lambda_event.name}!")
Environment model
Finally, let's make the greeting word configurable through an environment variable.
First, let's create a file app/environment.py:
from pydantic_settings import BaseSettings


class LambdaEnvironment(BaseSettings):
    greeting: str = "Hello"
So, how does this work? Our LambdaEnvironment extends pydantic-settings' BaseSettings, and when we create an instance with LambdaEnvironment(), it reads the values straight from the environment variables. There is no manual os.environ plumbing to write.
By default, the field name is matched against the environment variable name case-insensitively. So our greeting field is populated from the GREETING environment variable, which we will set later in the Terraform section.
As with the event model, we use the default value as a fallback. If GREETING is not set, the field falls back to "Hello".
And here is the real reason to reach for pydantic-settings instead of reading os.environ yourself: the values are validated and coerced to the field type. A field typed as int will parse "3" into 3, and reject anything that is not a valid integer right at startup.
Be mindful that environment = LambdaEnvironment() is a module-level global, so it is read once per cold start, not on every invocation. If you change the environment variable, you will not see the new value until a new container spins up.
You can read a little more on Lambda containers in my AWS Lambda: Instances and start types post.
And, let's also wire it up to our main.py:
import logging

from app.environment import LambdaEnvironment
from app.models.event import LambdaEvent

logger = logging.getLogger(__name__)
logger.setLevel(logging.INFO)

environment: LambdaEnvironment = LambdaEnvironment()

def handler(event, context):
    lambda_event = LambdaEvent.model_validate(event)
    logger.info(f"{environment.greeting}, {lambda_event.name}!")
Packaging and deploying the Lambda
Now that the Lambda code is done, let's move on to packaging and deployment. You can follow along by running each command in order.
Packaging the Lambda with uv
Based on the official AWS documentation, the Lambda zip package structure is flat, so the dependencies and the Lambda code all sit at a single level.
I will be following official uv guide to package the Lambda:
uv export --frozen --no-dev --no-editable -o requirements.txt

uv pip install \
   --no-installer-metadata \
   --no-compile-bytecode \
   --python-platform aarch64-manylinux2014 \
   --python 3.13 \
   --target build \
   -r requirements.txt
I am using the ARM architecture because it costs less and still gives good performance. Use x86_64-manylinux2014 as the platform value if you want your Lambda to run on the x86_64 architecture.
Now that the requirements are installed, let's archive them:
cd build
zip -r ../lambda.zip .
cd ..
As a final step, let's add our Lambda code to the archive:
zip -r lambda.zip appOur Terraform module reads the zip from the terraform/ directory, as you will see in the filename and source_code_hash values, so let's move the archive there:
mv lambda.zip terraform/lambda.zipTerraform configuration and dependencies
First things first - we need to set the Terraform version and declare the provider versions. That goes into a terraform/terraform.tf file:
terraform {
  required_providers {
    aws = {
      source  = "hashicorp/aws"
      version = "~> 6.5"
    }
  }

  required_version = ">= 1.10"
}
The terraform {} block configures Terraform itself. Inside it, required_providers declares which providers this configuration needs. Here we ask for the AWS provider, sourced from the hashicorp/aws registry, constrained to version ~> 6.5. The required_version = ">= 1.10" line sets the minimum Terraform CLI version we support.
Why pin versions at all? It keeps deploys reproducible, and it protects you from surprise breakage when a provider or the CLI ships a new release. This ties into the plan-reading habit we will get to later.
The ~> is Terraform's pessimistic constraint operator. ~> 6.5 means "6.5.0 and above, but below 7.0.0", so you get patch and minor updates within the 6.x line, but never an automatic jump to 7.0.
One more thing: you may notice we split this across two files. terraform.tf holds the Terraform and provider requirements, while providers.tf holds the provider configuration. It is a common convention that keeps things tidy.
Configure AWS provider
Next, we need to configure AWS provider by creating a terraform/providers.tf:
provider "aws" {
  region = "eu-central-1"
}
This configures the AWS provider. The only thing we set here is the region, eu-central-1. Change it to whichever region you want your Lambda to live in.
Notice that we do not put any credentials in this file. The provider picks them up from the standard AWS credential chain - your environment variables or your ~/.aws configuration - which means nothing sensitive gets committed to the repository.
One thing to be aware of: this setup uses local state. Terraform stores its state in a terraform.tfstate file on your disk, which is fine for a demo like this one. For production, or anytime more than one person touches the infrastructure, you want a remote backend, for example S3, with state locking, so two applies cannot corrupt the state at the same time. You can read more about backends in the Terraform documentation.
Lambda configuration
Now, the main part.
module "lambda" {
  source  = "moritzzimmer/lambda/aws"
  version = "8.6.0"

  filename         = "lambda.zip"
  function_name    = "demo-lambda"
  handler          = "app.main.handler"
  runtime          = "python3.13"
  source_code_hash = filebase64sha256("${path.module}/lambda.zip")

  architectures = ["arm64"]

  environment = {
    variables = {
      GREETING = "Hi"
    }
  }
}
I am using the moritzzimmer/lambda/aws module, which encapsulates a bunch of things for us. From this single block, it creates the Lambda function, an IAM execution role, the permission for that role to write logs, and the CloudWatch log group. That is around fifty lines of hand-written function, role, policy, and log group configuration that we get to skip.
Let's walk through the variables we pass in:
filenamepoints to the zip archive we packaged earlier.function_nameis the name the Lambda will have in AWS.handleris the entry point,app.main.handler, which points to thehandlerfunction inapp/main.py.runtimeis the Python version the Lambda runs on.architecturesis set toarm64, matching the ARM platform we packaged our dependencies for.environment.variables.GREETINGsets the environment variable that ourLambdaEnvironmentmodel reads, as we covered earlier.
The one worth a closer look is source_code_hash:
source_code_hash = filebase64sha256("${path.module}/lambda.zip")This computes a hash of the zip archive. Terraform uses it to detect when the code has changed. Without it, updating the zip would not trigger a redeploy, and your changes would silently stay on your machine.
The module also exposes a number of outputs, such as the function ARN and name, the log group, and the role. We do not need any of them for this demo, but they are there if you want to wire something up, and they are listed on the module's registry page.
Deploying with Terraform
With the Terraform CLI installed and configured, and the AWS credentials configured, you should be able to deploy the Lambda now to your AWS environment.
Let's start by initializing the Terraform modules:
cd terraform
terraform init
This downloads the required modules to the local workspace and creates the lock file. I did not push one on purpose.
Then, we can run the plan command to take a look at what resources are about to be created:
terraform planAlways read the plan and make sure Terraform is planning only the changes you expect. With provider updates, module updates, or any other dependency changes, unexpected things can start to happen. Once the plan looks good, let's run the deployment:
terraform applyTesting the Lambda in the AWS console
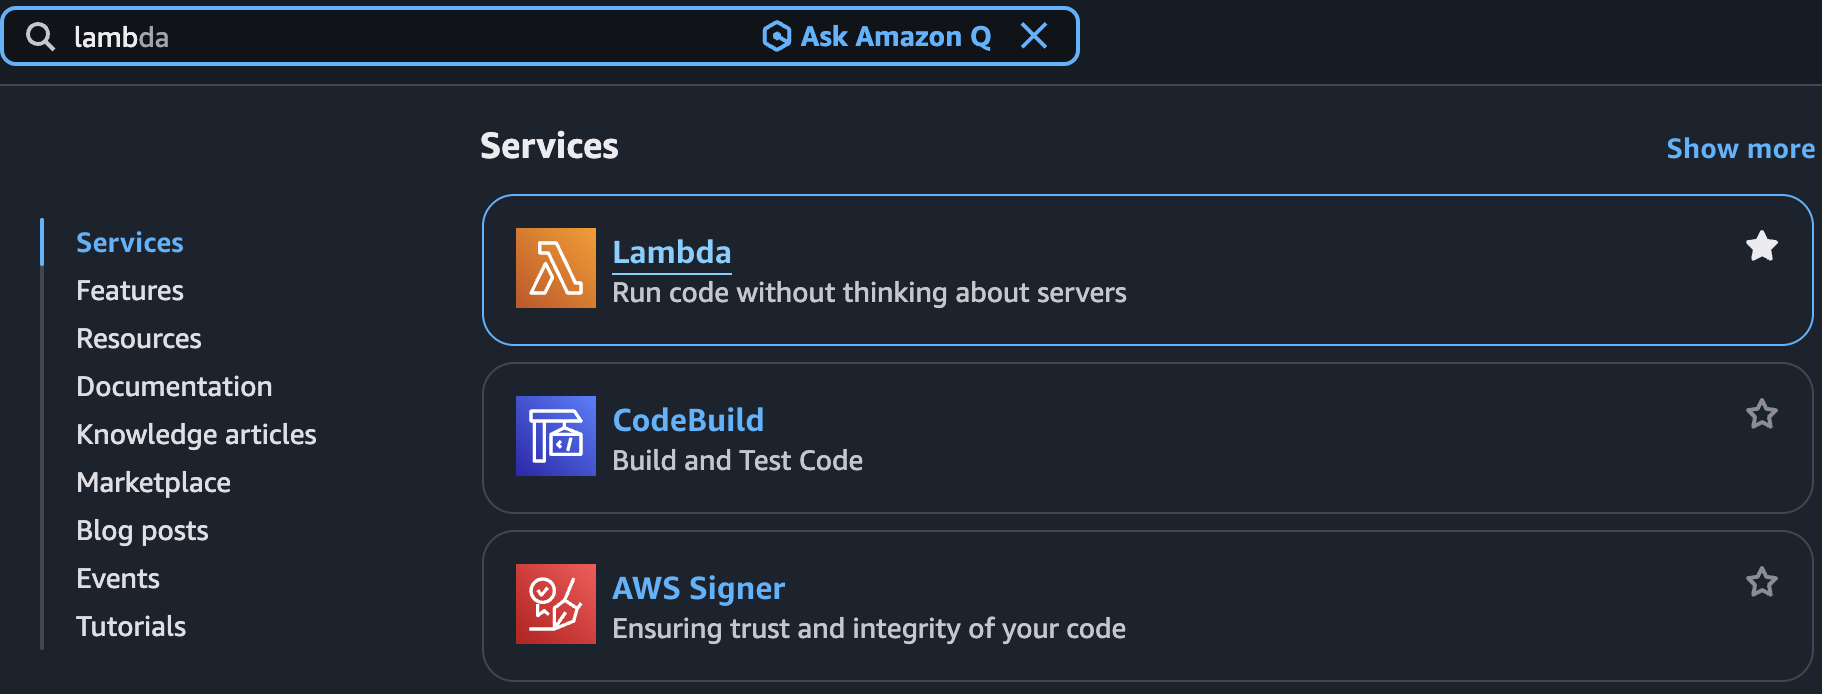
Once the apply is done, head to the AWS console and sign in. On the console home screen, click the search bar, type in Lambda, then select the Lambda result on the right to open the Lambda home screen.
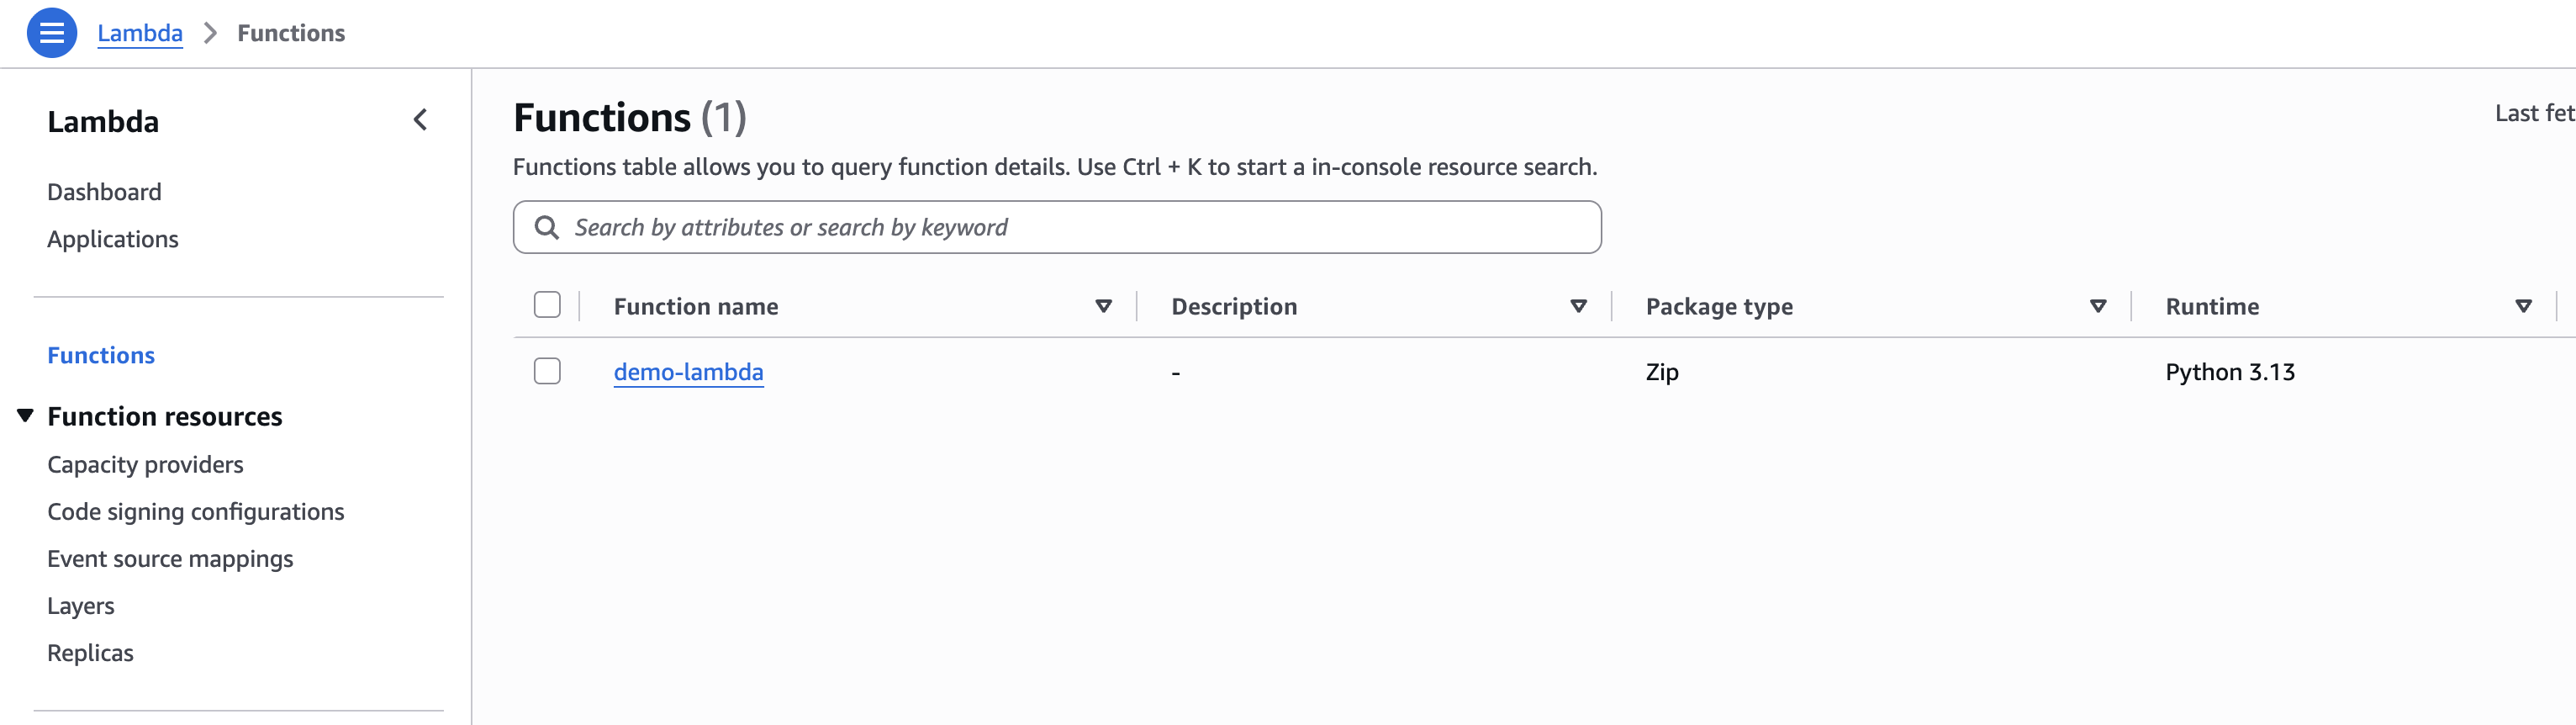
Once on the Lambda home page, you should see your Lambda function right there:
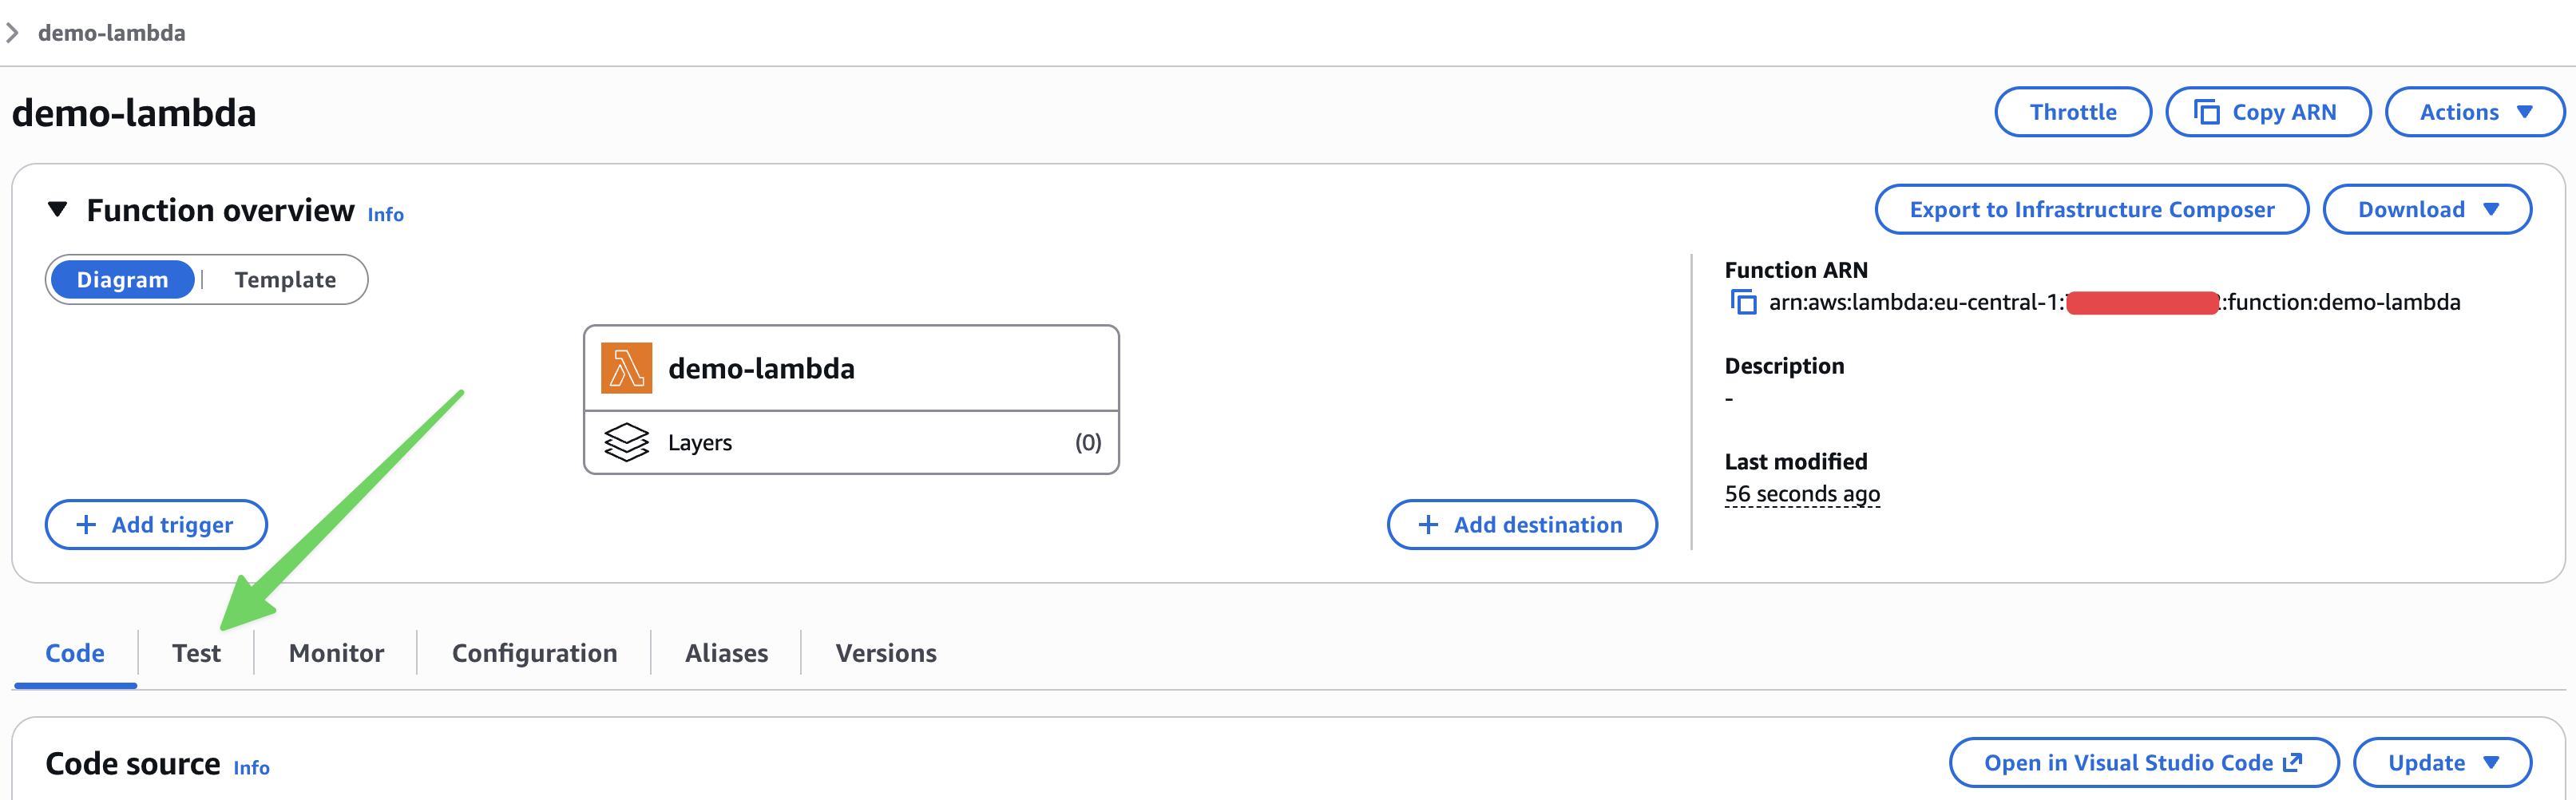
Click on the function name to navigate to the function details page. From there, go to the Lambda testing tab called Test:
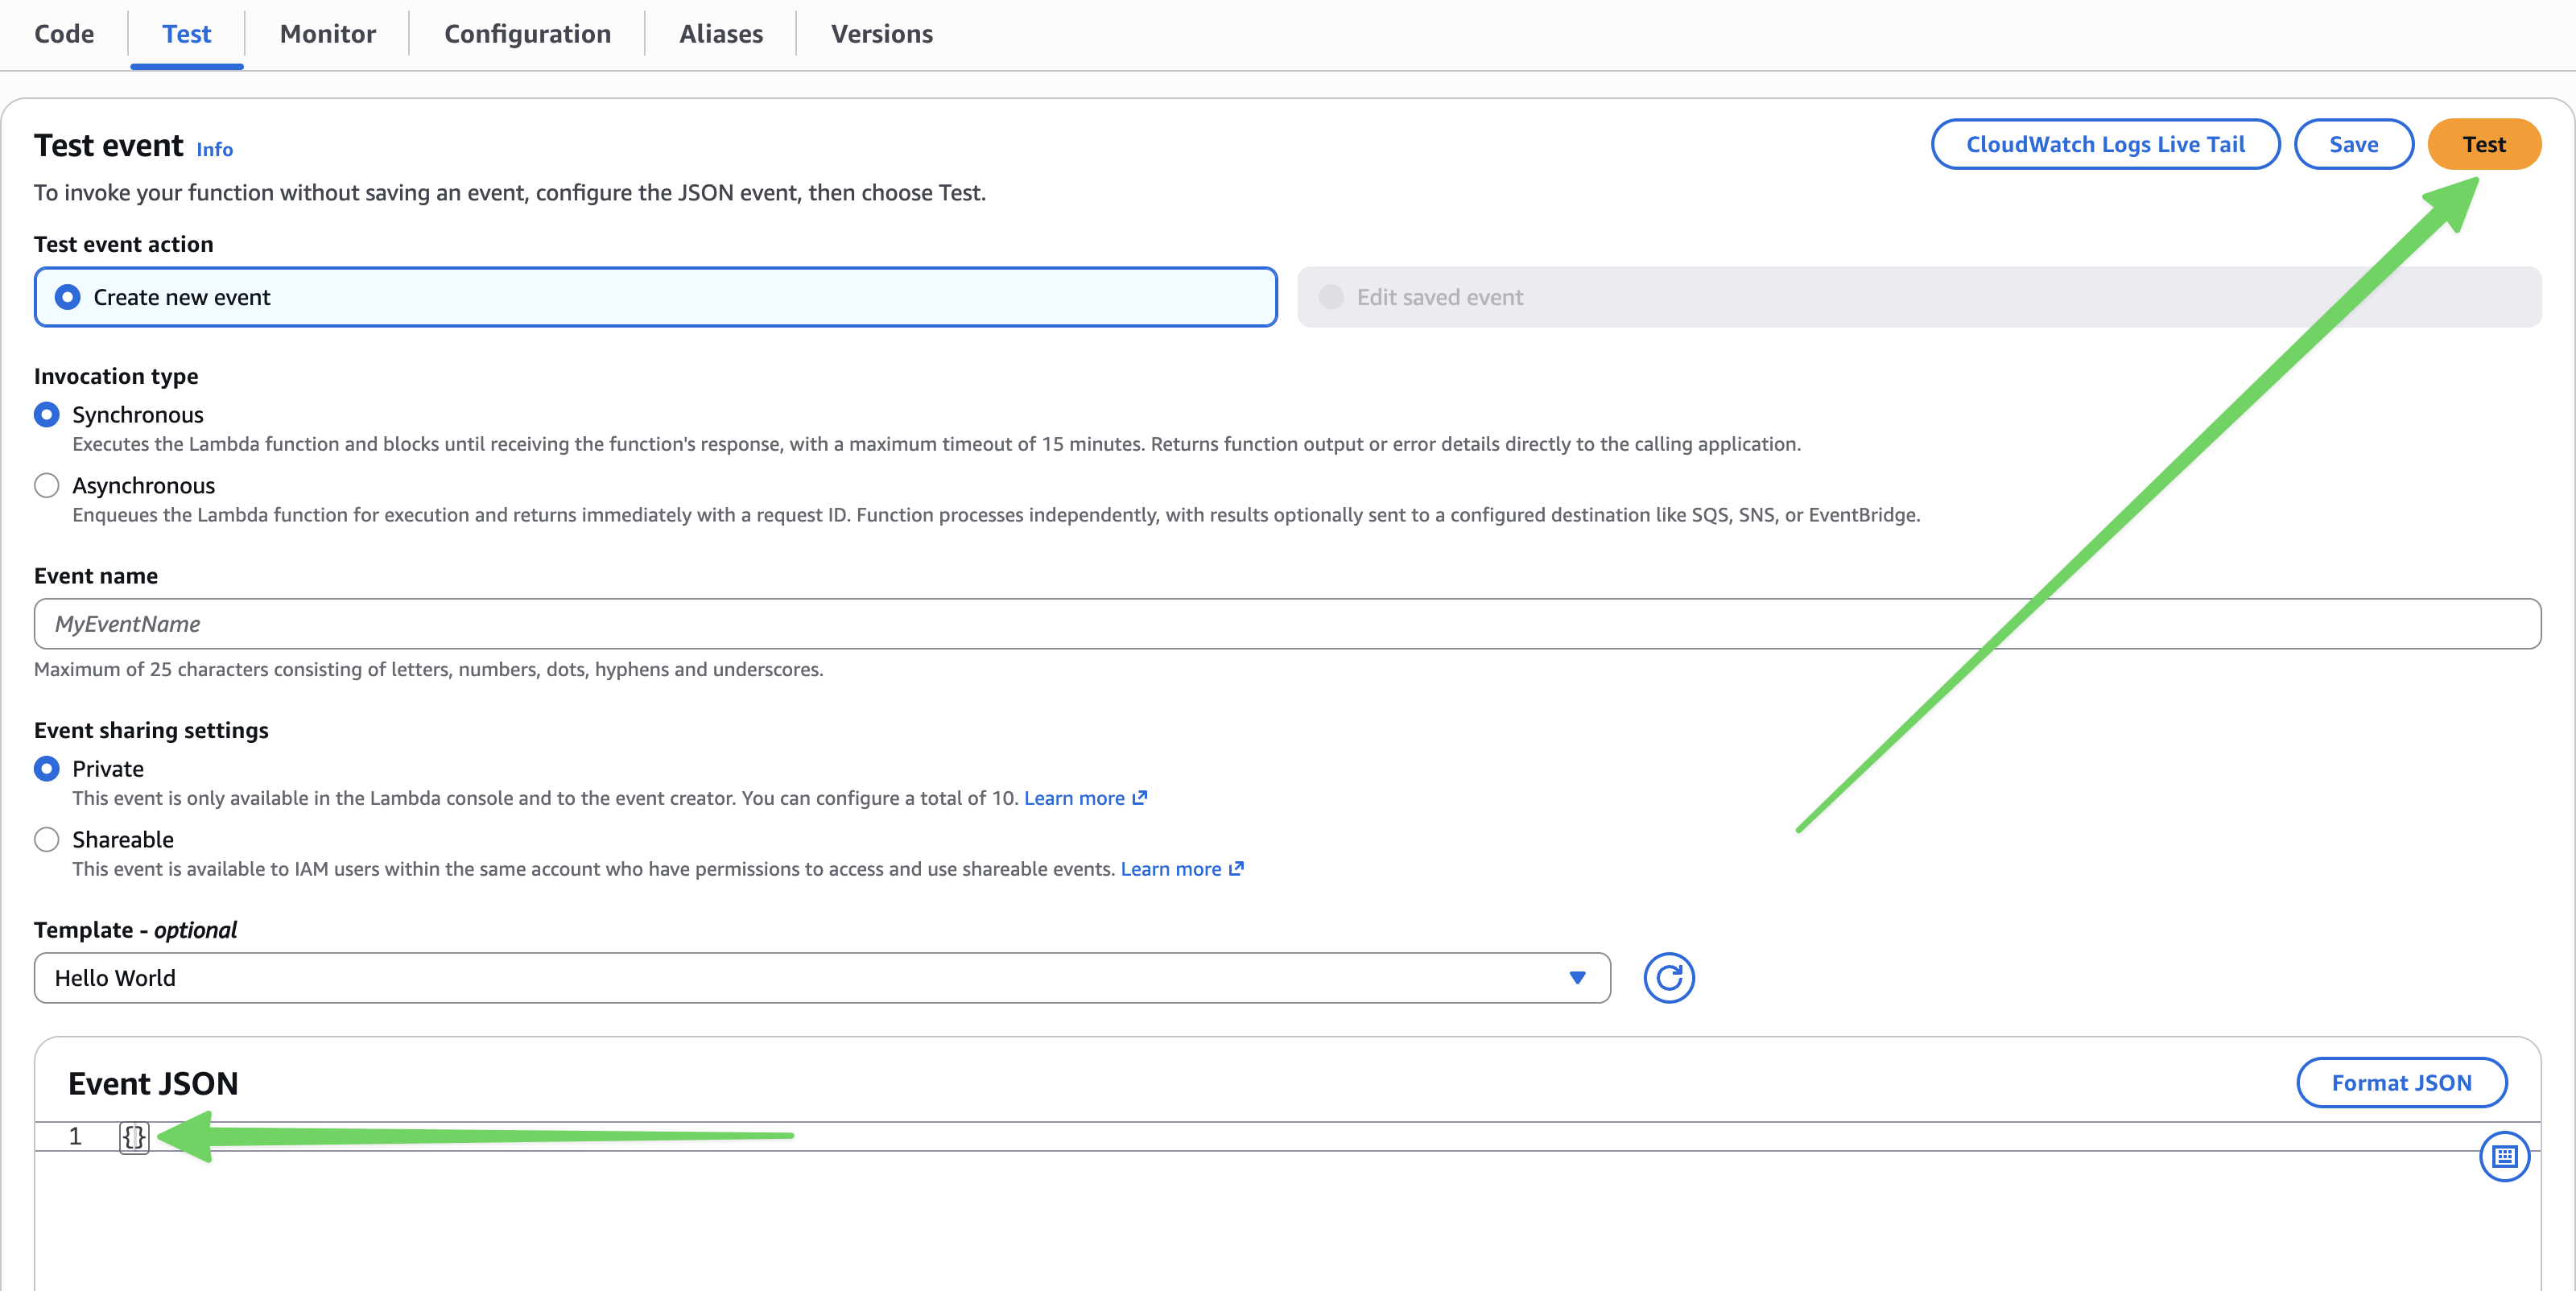
Once on the Lambda testing tab, scroll down to the Event JSON input field, and make it an empty object, then hit the Test button:
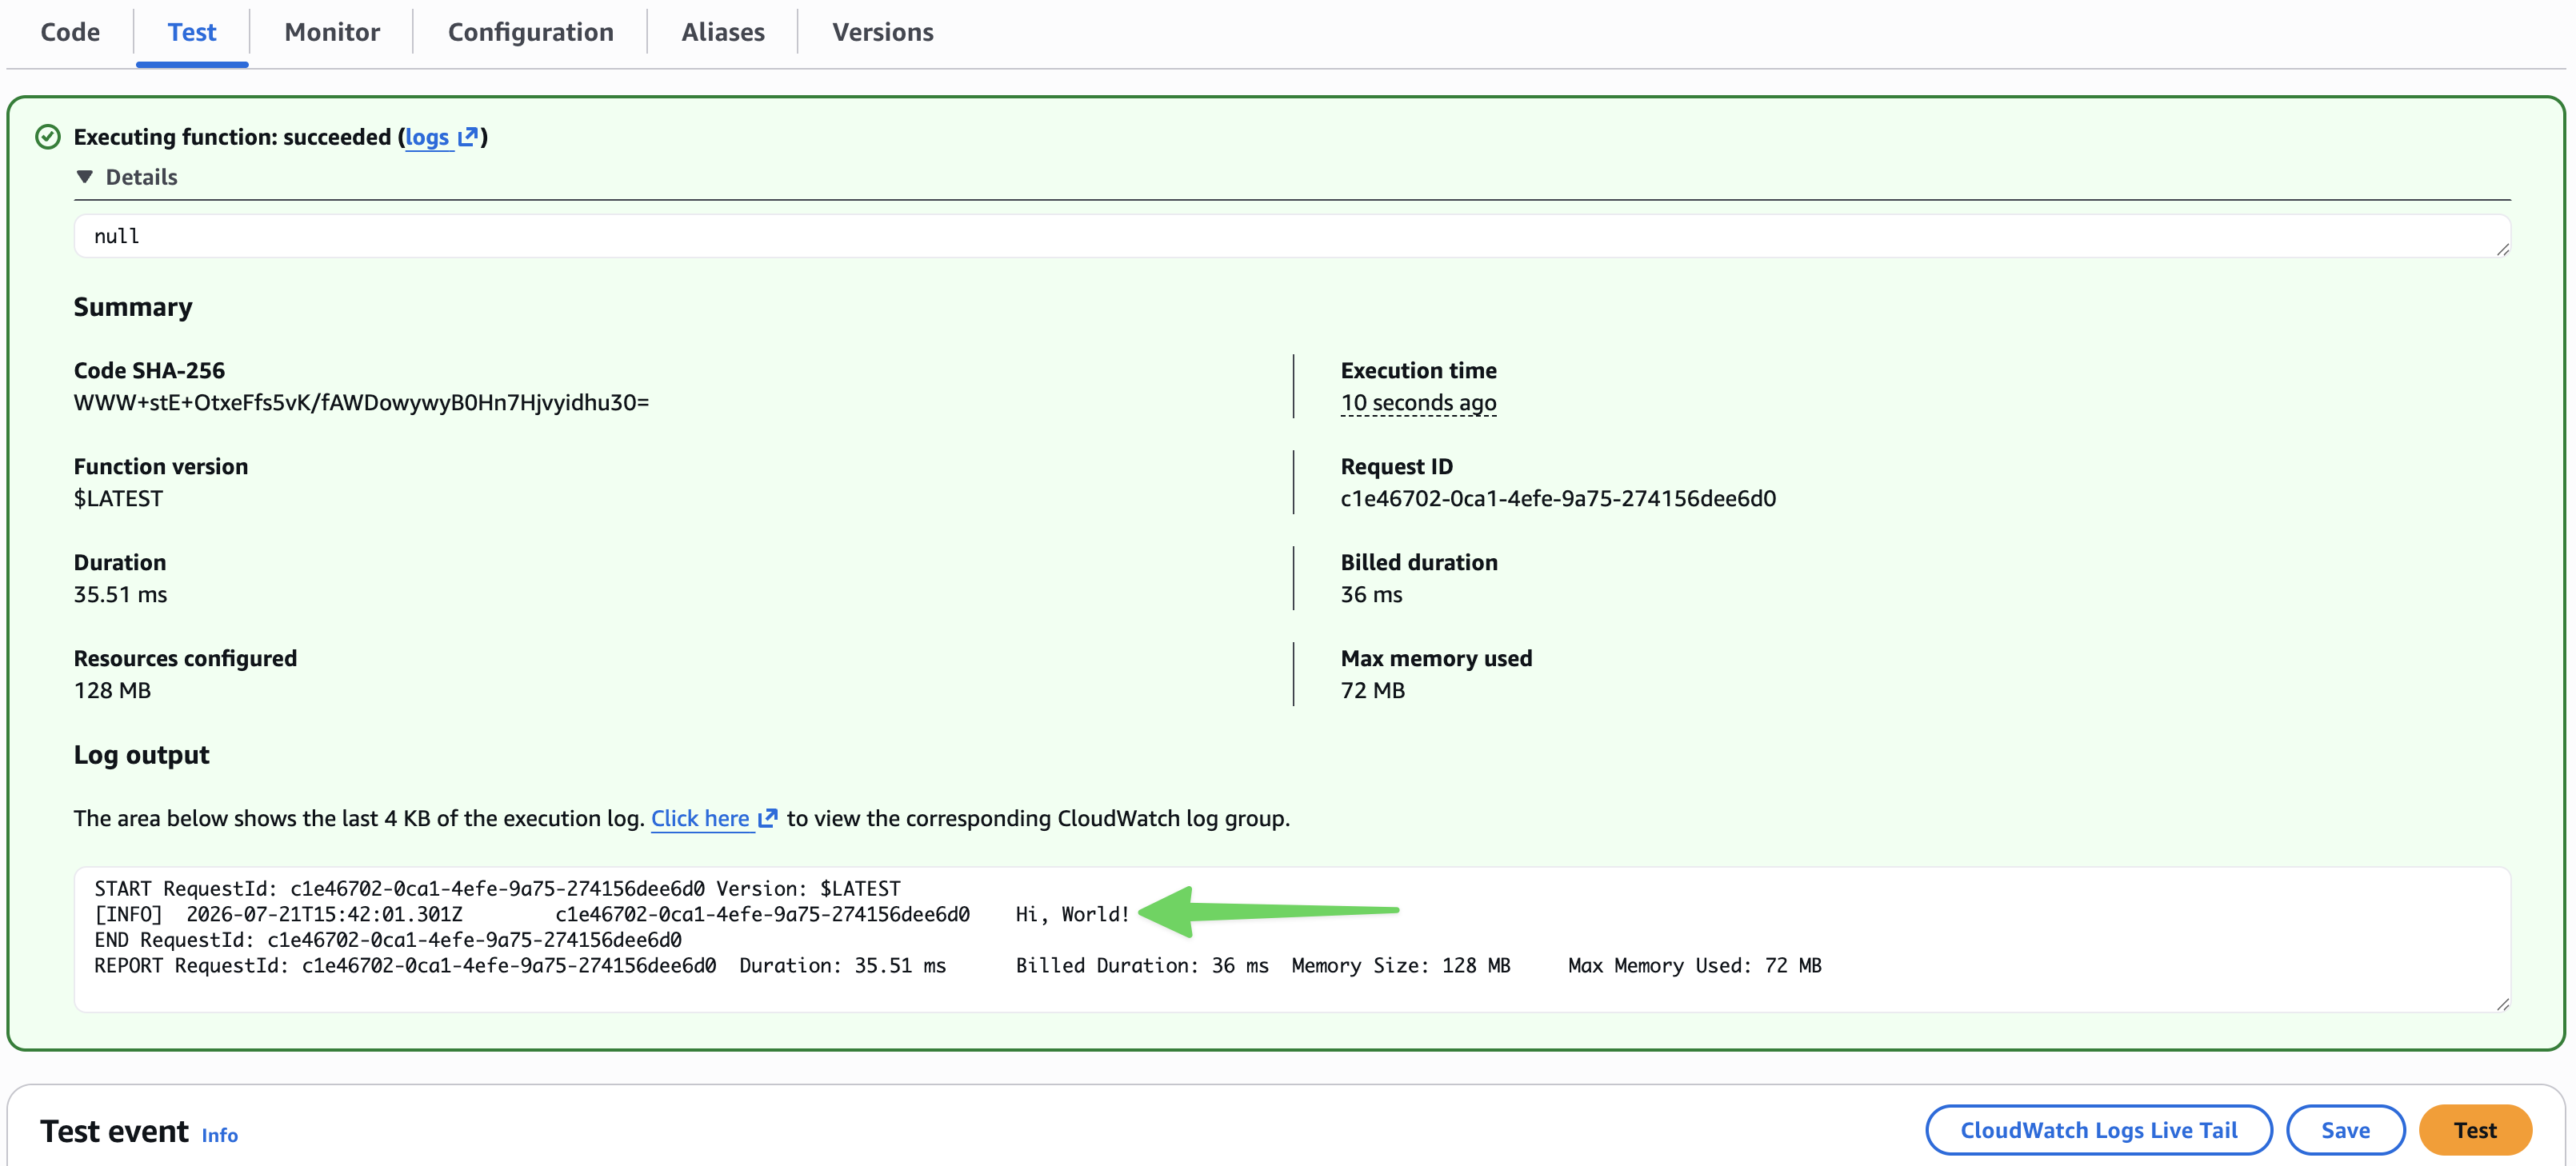
You will see the Lambda run, and a new result panel will appear above the Test button. Expand it and find the execution logs. Notice what gets logged: our default name value and the GREETING environment variable we set in Terraform:
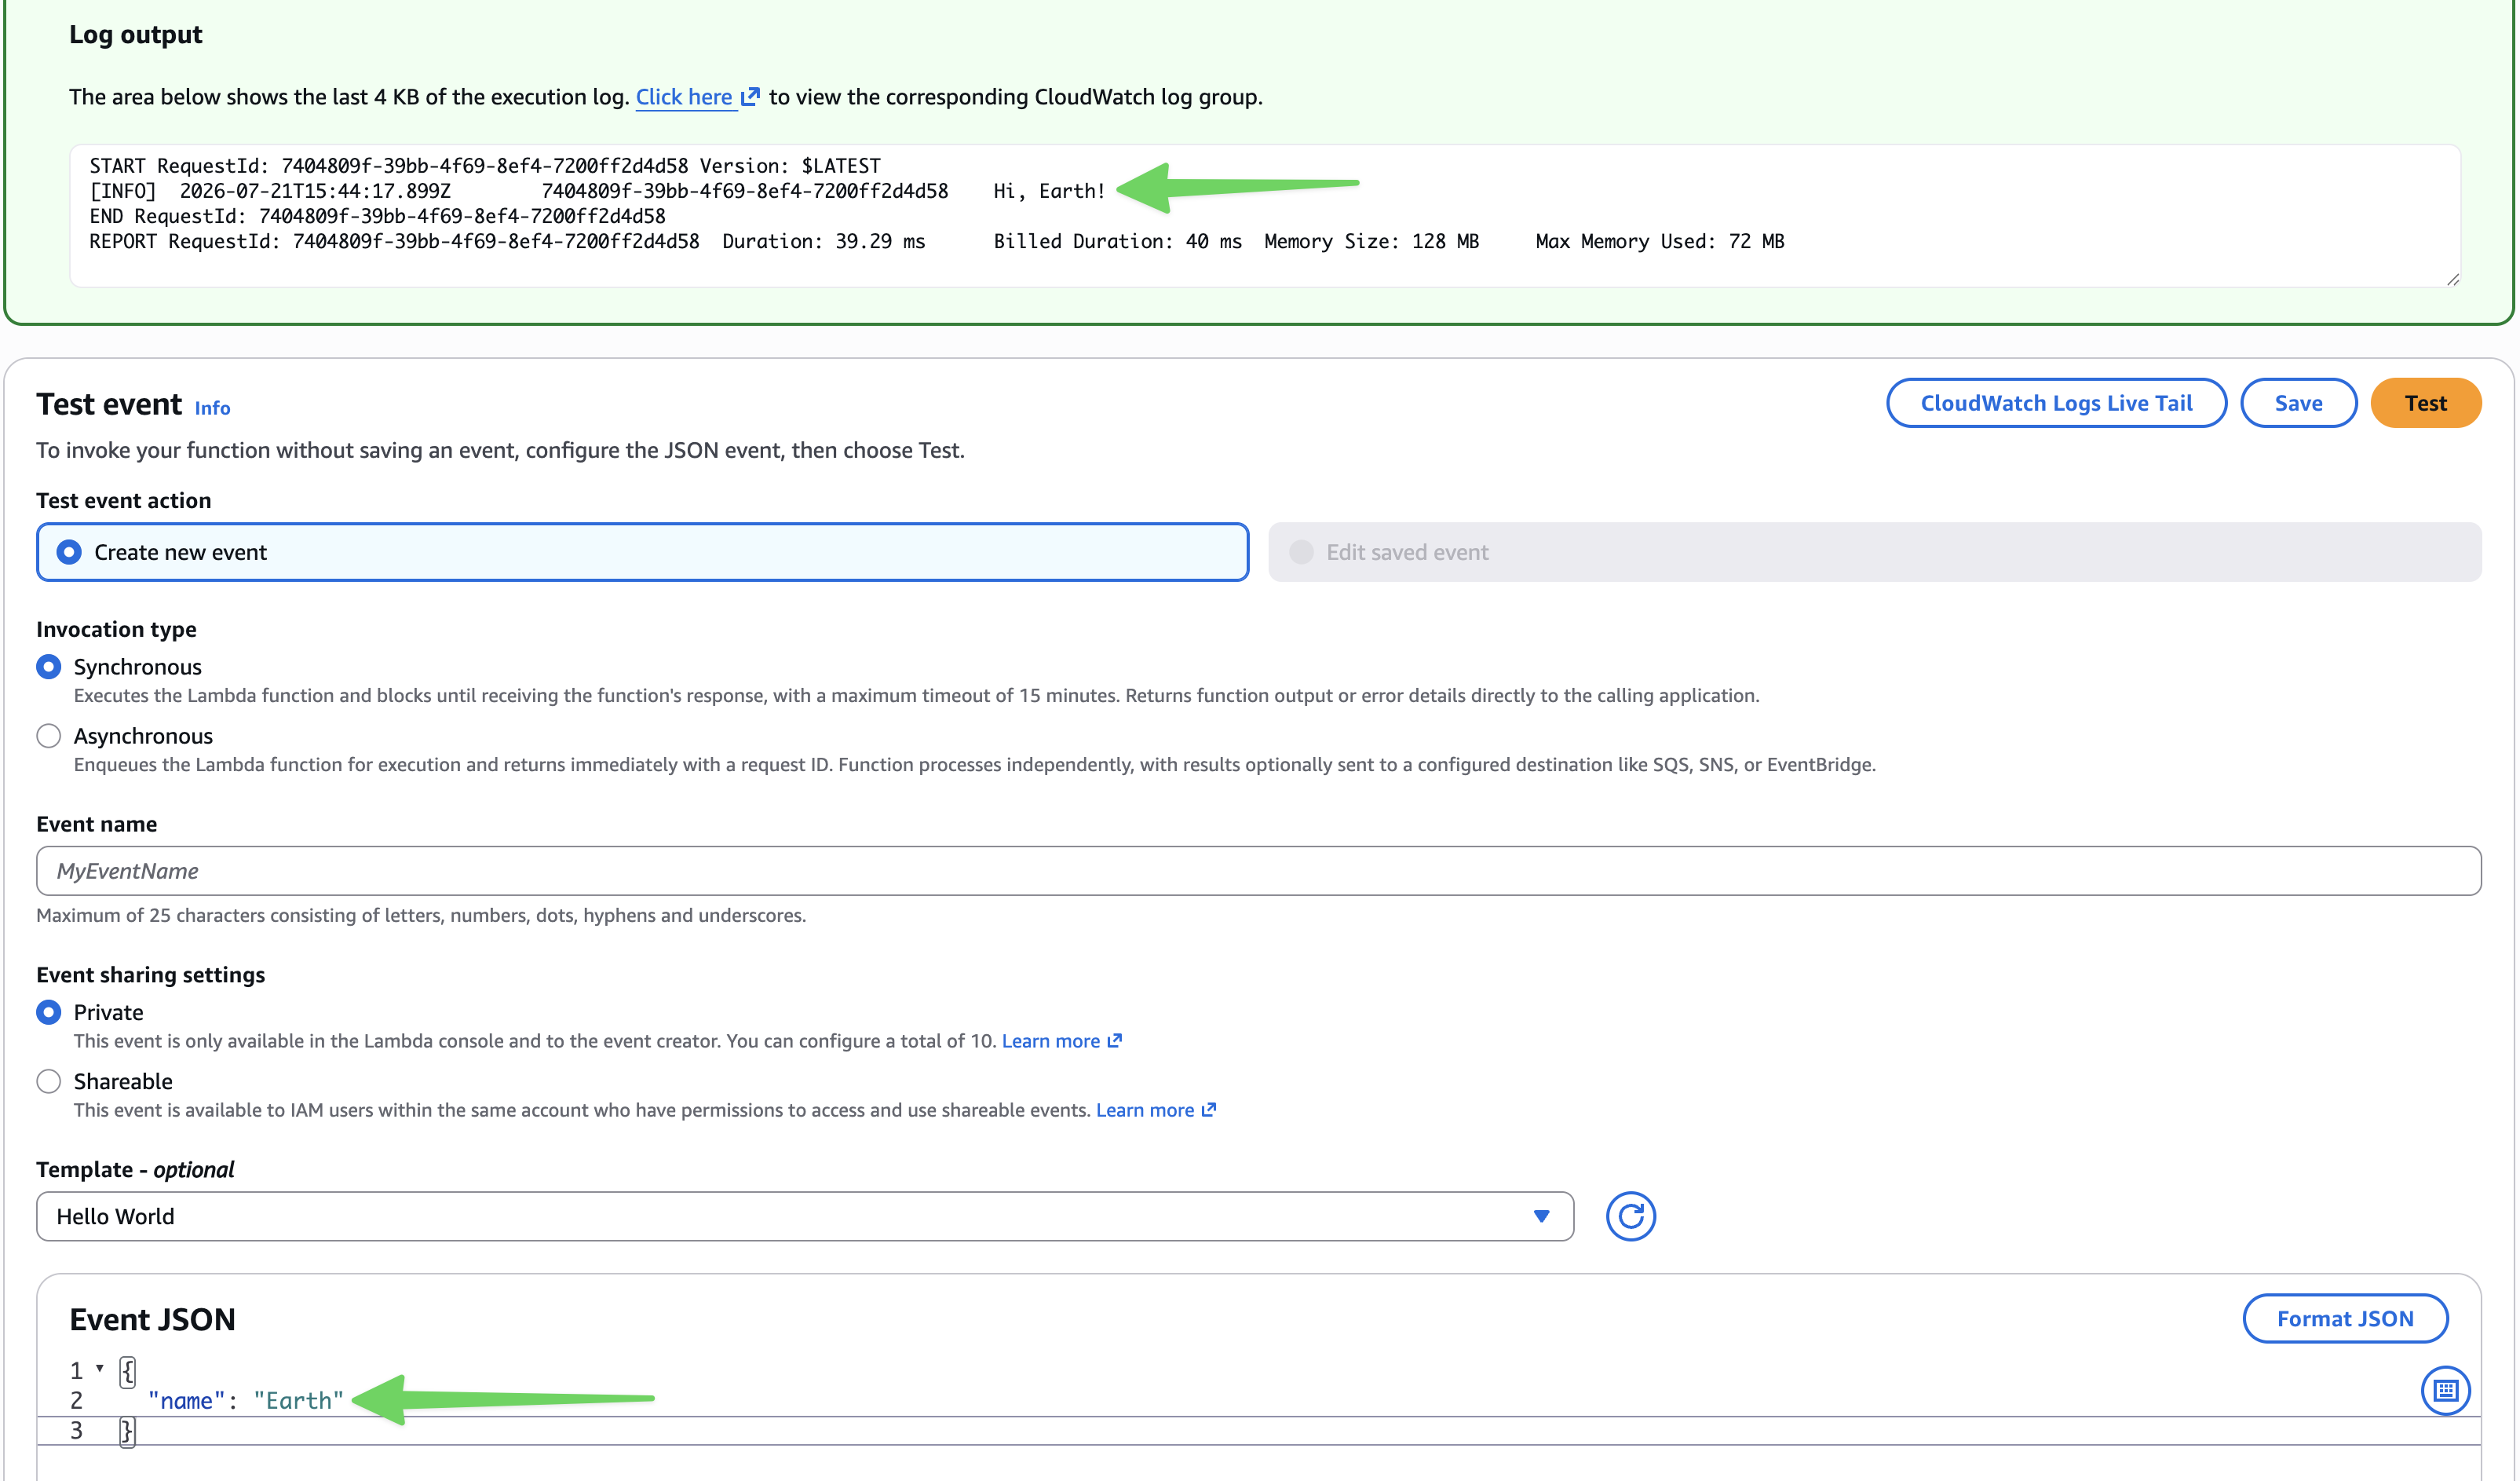
Let's try to make it greet something else. Let's pass in an Event JSON that looks like this:
{
  "name": "Earth"
}
And here is the result we get:
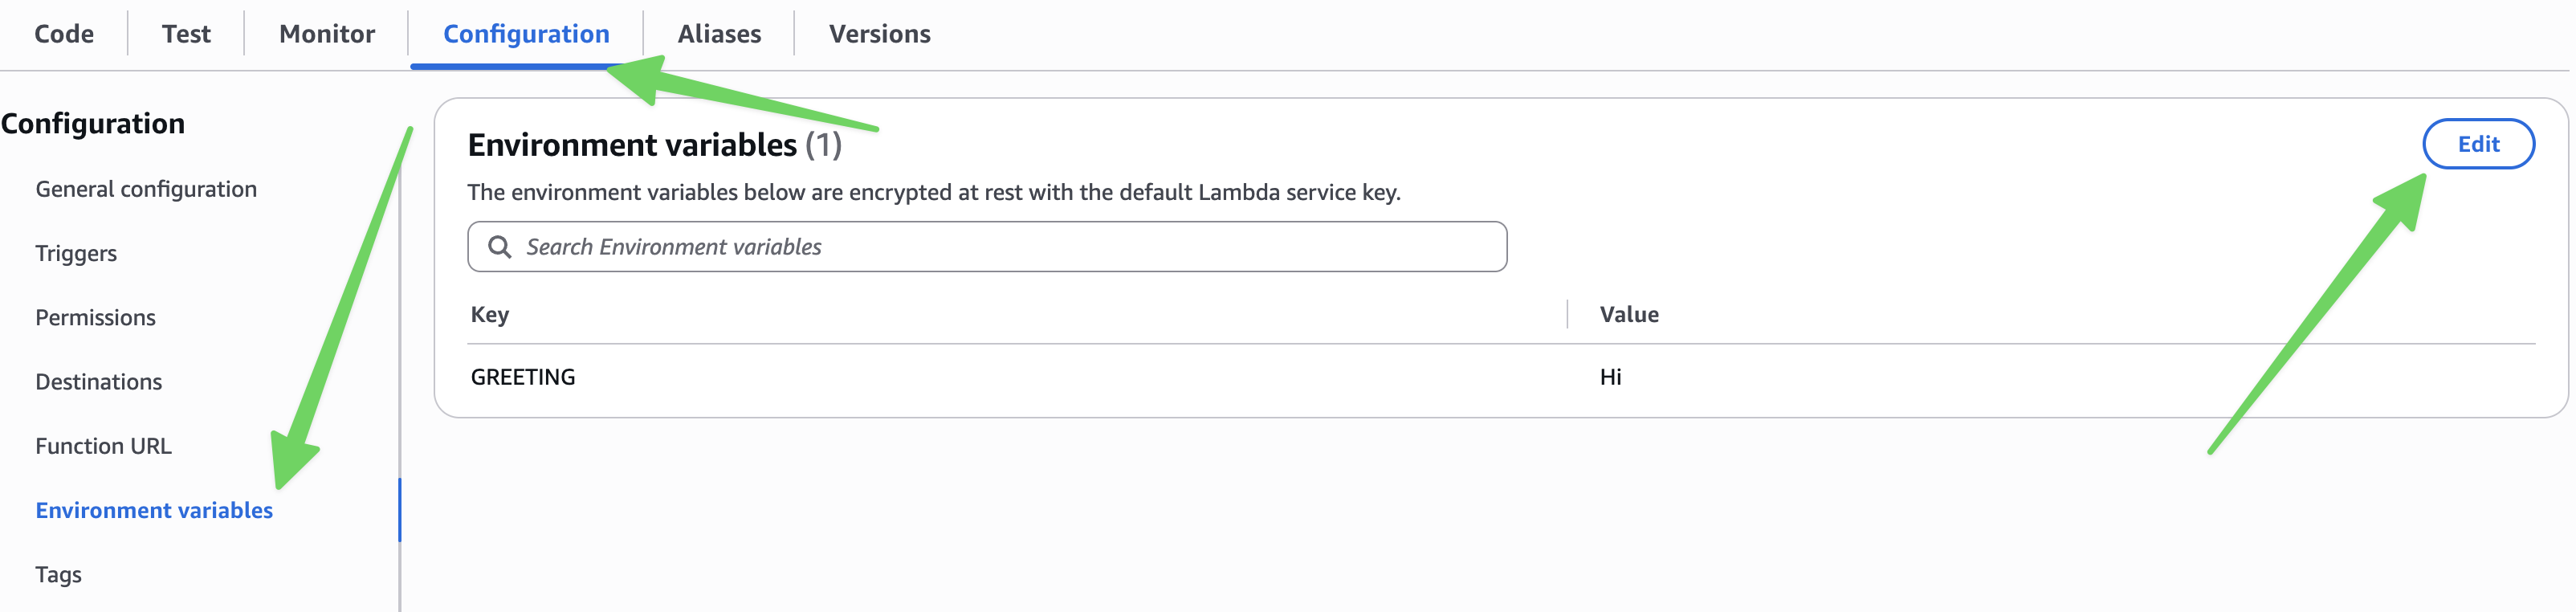
If you want to change the greeting, you need to change the Lambda function's environment variable. Navigate to the Configuration tab, then select Environment variables on the left. On that page, hit the Edit button and make your changes. I will not get into the details on that one.
Changing the environment variable in the AWS console is not an ideal way to change the behavior. I only do it this way for demo purposes. Making changes manually in the AWS console will put the Lambda's environment out of sync with the Terraform source checked into source control. In the real world, all changes should be applied through terraform. The only exception would be a live incident where changes need to happen as fast as possible - then I would use the console, making sure I update the Terraform configuration as soon as possible.
Changing a Lambda's environment variable makes it spin up a new instance on the next invocation, so that invocation will be a cold start.
Destroying the resources
To avoid any unexpected charges, make sure to destroy the infrastructure created in this guide by running the terraform apply -destroy command.
Final words
That is the full setup: a Python Lambda managed with uv, packaged into a flat zip, and deployed end to end with Terraform. No Serverless Framework, and no CloudFormation to troubleshoot.
You can find all of the code from this article in dhrimov/demo-aws-lambda-terraform-uv.
You may have noticed the packaging involves a handful of manual steps: exporting the requirements, installing them for the right platform, zipping the build, adding the app code, and moving the archive into the terraform/ folder. I wrapped all of that into a small bash script that lives in the repository, so you can package and deploy without running each command by hand, and it keeps the workspace clean between runs.
Update: I later reworked that packaging script - reproducible builds, and automatic handling of the 250 MB Lambda size limit. I wrote about it here: Packaging Python Lambdas with uv and package-python-function.
Thank you so much for taking the time to read this. If you have questions or run into anything, please reach out. Happy coding!